 See also: All About GIMP – A Simple User Guide.
Took me ages to work this out so I hope it comes in handy for you.
If you’ve ever used GIMP then you will know that it’s not the most intuitive graphics editor to learn to use. To prove that point, I frequently open images in Kolourpaint (the Linux equivalent to Window’s Paint) to make minor edits then re-open them in GIMP to do the bits I can’t do in Kolourpaint and vice-verse. I know GIMP is a powerful graphics editor I just wish it were more intuitive. Anyway…
Two things I recently learned to do with GIMP:
- Convert every occurrence of a particular colour into a transparent region (good for web graphics), and
- Make an image semi transparent so that it may be used as a watermark.
Here’s how to do those tasks.
Make a Colour Transparent
You can make any background colour or any colour within an item transparent. Here’s the method:
- open the image you want to edit with GIMP (right-click it, select Open With… then choose GIMP),
- right-click the image then move your cursor to Colours and select Colour to Alpha,
- in the pop-up box you will see a preview of your image with a (usually) white rectangular bar displayed below it (as outlined in red in image 1). Left-click that bar and a Colour to Alpha Colour Picker dialogue box will pop-up (image 2). In this new box there is another coloured bar (highlighted in red in Image 2). To the right of that bar is an image of a dropper. Left-click the dropper then left-click the color on your image that you’d like to make transparent. Once done, click OK twice,
- that’s it, anything of your chosen colour will now be transparent.
- Either save the image as a PNG file else merge the layers then save it as a GIF or JPEG. To merge the layers, right-click the image, move your cursor to Image then select Merge Visible Layers.
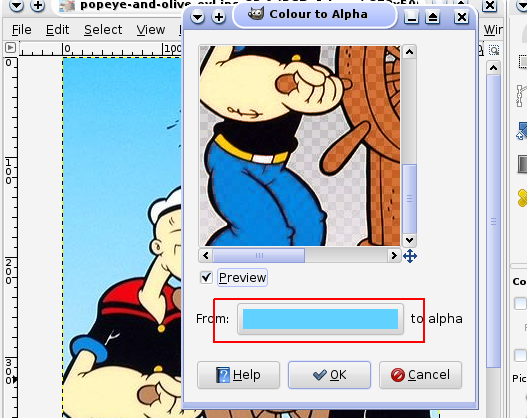
Image 1: the highlighted box contains the colour that is to be made transparent.
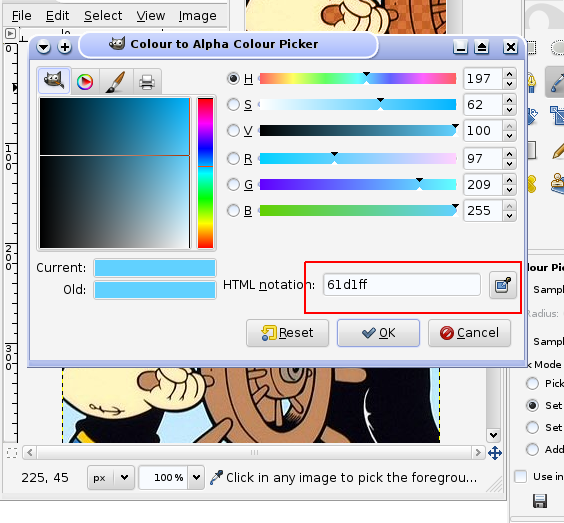
Image 2: the highlighted box contains the colour value that is to be made transparent.

Image 3: The image with a background I wished to make transparent.
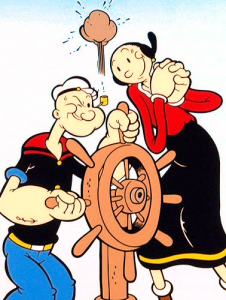
Image 4: The almost finished product.
If you look closely you will see that the image with the transparent background still has some blue sky showing at its top. Had I wanted to remove that then I could either re-apply the above method but choosing that particular shade of blue to make transparent or I could have rubbed it out using the eraser with an opacity setting chosen.
Make a Complete Image Semi-Transparent
Here’s a picture that I could use as a background image on a web-page:
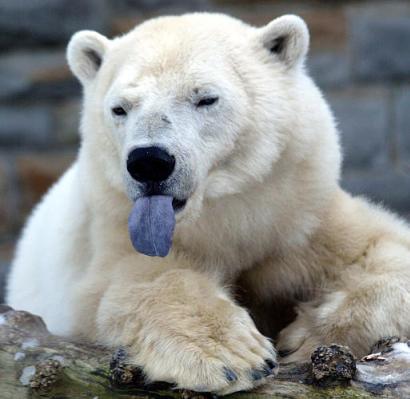
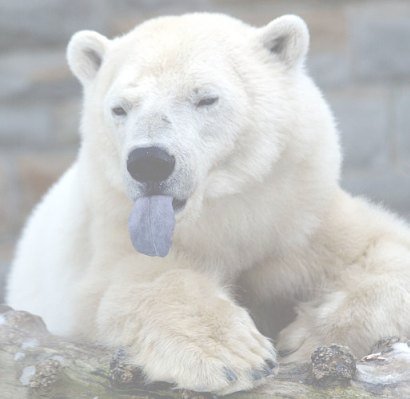
I would need to make it a little more watermark like before I could use it as a background image otherwise it could make it hard to discern any text on the page. To turn the image into a “watermark” I’d need to make it partially transparent by altering the image’s opacitysetting in GIMP. Here’s how to do that:
- open the image with GIMP,
- use the top menu bar to browse the Windows menu and move your cursor downwards to Dockable Dialogues then select Layers. Alternatively, press Ctrl+L,
- the Layers dialogue box has an Opacity slider control. Ensure your image is highlighted then move the slider to your desired opacity level (50% is generally good enough),
- next we flatten the image by right-clicking over the image, moving the cursor to Image then selecting Flatten Image. We do this to ensure that the opacity is preserved when we save the image as a jpeg, gif or png etc.
- Voila! Save the image.
Extra Tips
Interlaced images contain more data than their non-interlaced counterparts so use non-interlaced files when you want an image to take up less room.
PNG Files are lossless which means they do not suffer image degradation during edits so convert your images to png format should you be editing and saving them multiple times. JPEG files are smaler than PNG’s so convert them to jpeg once you’ve finished editing them if you want them to take-up less storage space. Sometimes PNG files are smaller than GIF files, other times they’re larger – it varies from file to file.
Transparency and opacity are not the same properties. Opacity is the property of being variably see-through and usually has an associated back-drop colour (in the above watermark that back-drop colour is white). Transparency is the property of being entirely see-through and without any associated back-drop colour. Images with transparent regions will not hide (occlude) any image they overlay where those transparent images are present. Images with opacity hide (occlude) any images over which they are displayed.
Not all image formats are capable of preserving image transparency data. PNG does preserve it but IE6 and 7 do not properly render (display) transparency in PNG images; GIF preserves image transparency data and it is properly rendered by all browsers; JPEG doesn’t preserve image transparency at all.
Flattening and Merging Layers are not the same actions. When you flatten an image, you convert all the layers that make up that image into one layer. When you merge the layers, you only merge the visible layers not the invisible layers. Images that have been flattened lose any transparency they may have had. Images that have had their visible layers merged retain any transparency they may have.
