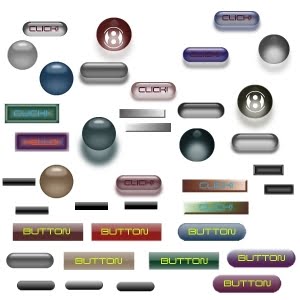
No, these are nothing like the buttons used to fasten shirts and unfasten women’s blouses  these are the type used to create wonderfully stylish clickable areas on web pages. In total, there are 21 free Gimp button brushes waiting to be downloaded. They are easy enough to use but I have provided full instructions and tips below for those who need them. Those instructions along with their usage and redistribution notes are also in the the Readme file packaged with the download.
The buttons are in greyscale so can be colored any way you like; they are without text to make it easier for you to customize them; and they are quicker to use than the scripts that originally created them. The ones shown in the image are only exemplary of the goodies given away in the download.
[wpdm_file id=”5″]
INSTALLATION
Unzip the downloaded file and place the gbr files contained in the GIMP-Brushes-Web-Buttons folder into your GIMP Brushes folder. Linux will find this in home/.gimp-2.6/brushes. Windows users, why don’t you migrate to Linux???? Just kidding  look for GIMP under Program Files then locate your Brushes folder under that.
USAGE INSTRUCTIONS
- create a blank canvass (File>New). Use a white background,
- select a brush color,
- select the paint brush icon from the Toolbox,
- select one of the buttons (brushes) from the Layers and Channels box,
- paint the brush onto the canvass (press the left mouse button multiple times if you want a deeper colour),
- follow this step if your chosen button has curved edges, otherwise skip to step 7:
- select the fuzzy select tool (it’s in the Toolbox, 4th one from the left along the top row, looks like a magic wand). Adjust the threshold for precision (between 90 and 100 is usually best),
- left click on the canvass (not the button),
- make the selected areas transparent (right click and select Colours>Colour to Alpha and follow the presented instructions),
- autocrop the image (Image>Autocrop Image),
- save the image (for safety),
- if required, add text with the Text Tool (it’s in the Toolbox),
- save the image again but with a different name. This could be your inactive button.
- select the button layer,
- darken or lighten the image (Colours>Brightness-Contrast etc),
- save it again with a different name to the last one saved. This could be your active button.
- darken or lighten the image (Colours>Brightness-Contrast etc),
- save it again with a different name to the last one saved. This could be your hover button.
TIPS
- Two of the brushes are shadows. One is for use in combination with the Aqua Pill button, the other is for the Aqua Bou button. They are handy for creating shadows of different colour to the main button. The Aqua buttons already come in non-shadowed and shadowed form;
- Some of the buttons may be filled with gradients (Colours>Map>Gradient Map) etc;
- It’s best to use dark colors or a combination of a light colour with a secondary dark color (with lowered opacity) superimposed over it i.e. use the same brush twice but with different colors;
- If a button’s background needs to be changed from transparent to a color just right click the image layer, create a new layer, fill it with your chosen color then move the layer’s position in the layer stack to place it under the button’s layer.
I wish you the best of fun with them.
[wpdm_file id=”5″]

